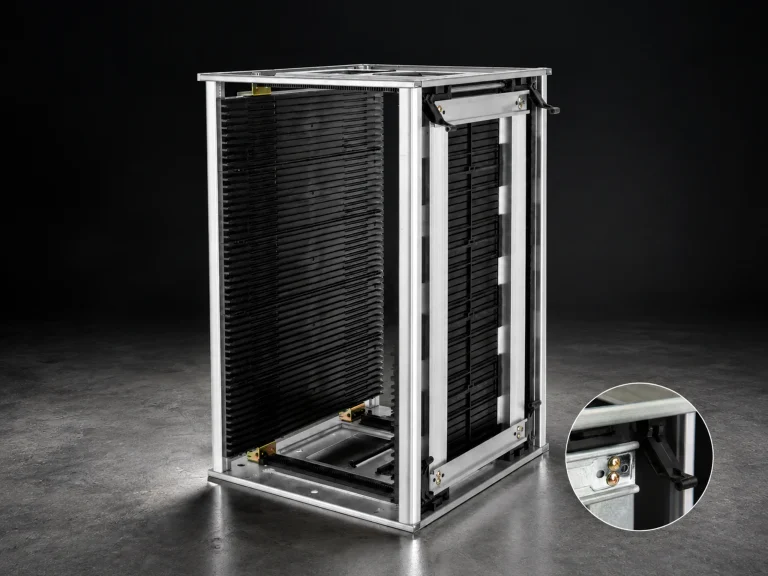


Choosing esd carts starts with the movement task, not the word “anti-static.” A cart may be used for PCB turnover, temporary storage, line-side replenishment, or a route between workshops. Those jobs can require different shelf, slot, wheel, brake, and access decisions.
The practical method is to define the board or tray envelope, the way operators load it, the route it will travel, and the evidence the supplier must provide. The CH-ESD ESD Trolley category gives the product-family route; the named model pages should then be used to confirm the actual configuration.
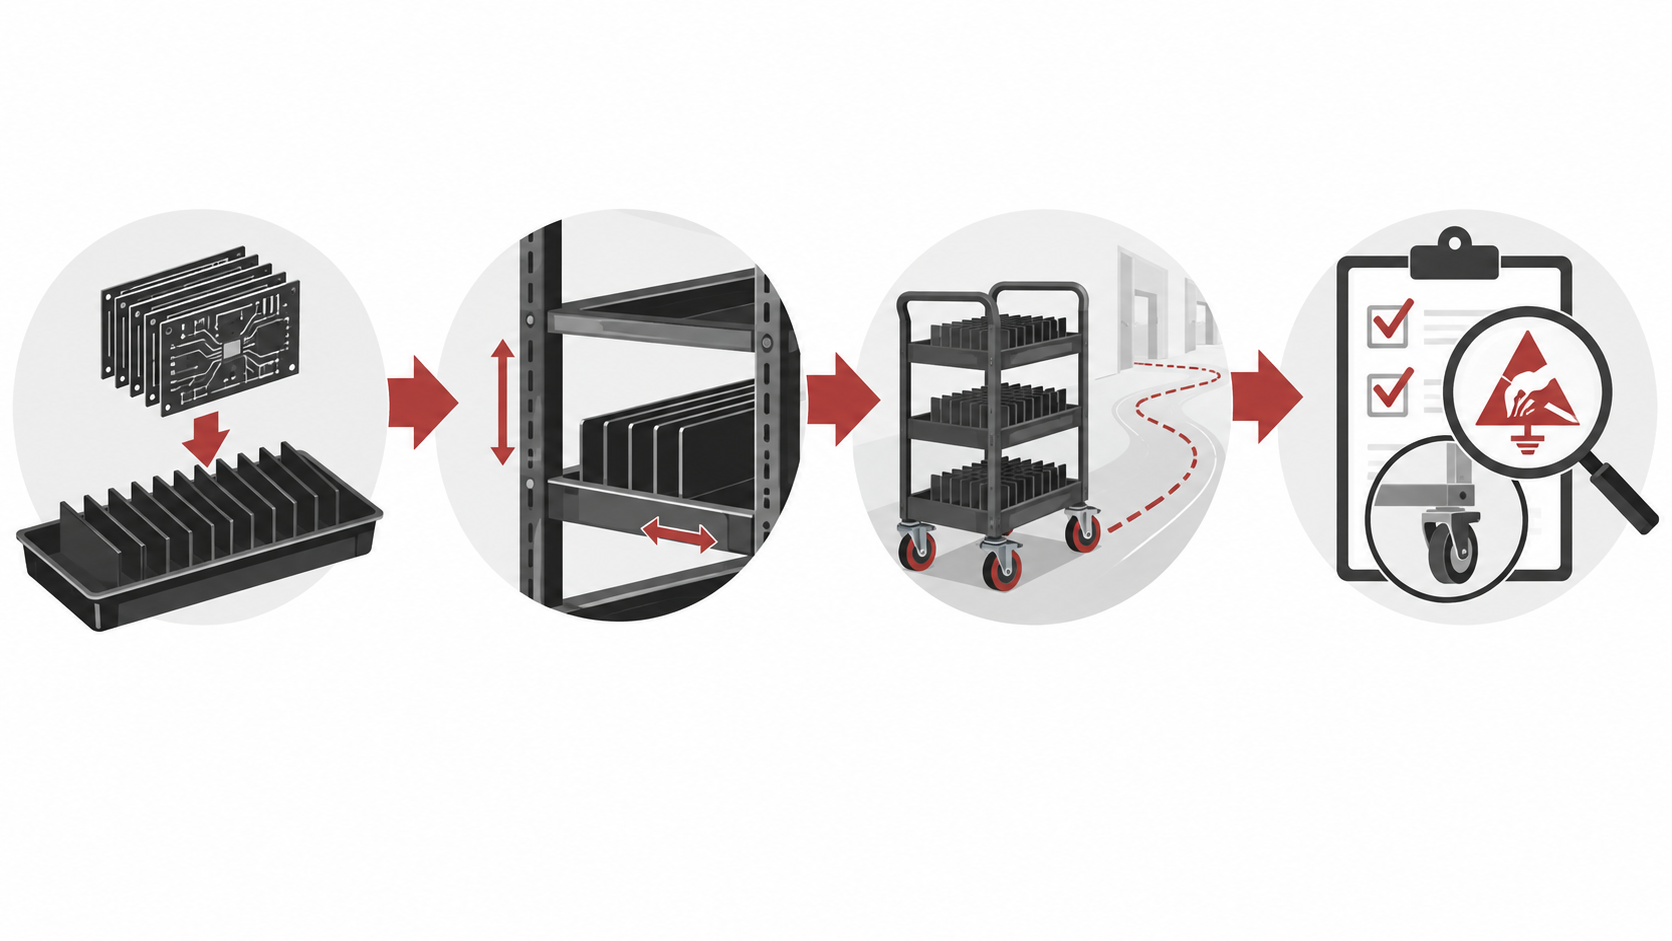
1. Match esd carts to the load and loading route
Start with the object that will sit in or on the cart. A PCB board, a tray, and a component container do not present the same support problem. Record the largest board or tray envelope, the usable clearance, the number of positions, and whether operators load from one side or both sides. If the cart receives a tray, measure the tray as the working unit rather than assuming the board alone defines the fit.
| Check | What to confirm |
|---|---|
| Load unit | PCB, tray, magazine, or container; include the largest envelope and orientation. |
| Access | Top, front, side, or two-sided loading; include the normal reach path. |
| Route | Line-side station, rack, warehouse, receiving area, or repeated department movement. |
| Control point | Where the cart is parked, grounded, inspected, and replenished. |
The QD-9805201-2 page is a useful example of model-scoped information: it publishes adjustable width, groove information, slot count, storage capacity, weight bearing, wheels, and optional accessories. Treat those values as evidence for that named model. They are not a specification for every ESD cart.
2. Check geometry before comparing esd carts
Geometry determines whether the cart supports the board consistently during loading and movement. Check the support surface, groove or slot relationship, pitch, clearance from neighboring positions, and the position of any locking device. For a wide-adjustment design, ask which dimensions are adjustable and which remain fixed. A supplier drawing or sample fit check is more useful than a category label.
Also check the cart’s behavior at the handoff point. If a cart docks beside a rack, the transfer height and approach direction matter. If operators pull a board from a line-side position, the handle, brake, and aisle clearance matter. A cart that fits a board in a static photo may still be wrong for the route if the reach path forces contact with adjacent loads.
3. Separate wheel, brake, and ESD questions
Movement hardware and ESD control answer different questions. The product page describes anti-static wheels, optional brakes, and a grounding chain on the named transfer-cart configuration. Ask which wheel material, brake arrangement, grounding path, and floor conditions apply to the offered build. Dust, coatings, floor joints, and a disconnected chain can change the real route conditions.
Validate the proposed configuration on the actual floor before approval. Load a representative working quantity, move the cart through the narrowest turn, apply the brake at the normal parking point, and check the transfer height beside the station or rack. Record whether boards remain supported, whether the wheels track as expected, whether the handle leaves enough clearance, and whether the grounding path is connected as specified. Repeat the check after the cart has been cleaned or moved across the usual floor transition. Keep the observations with the model code and drawing revision so the result cannot be separated from the configuration that was tested.
Use the EOS/ESD and IEC guidance as the process boundary. The supplier should identify the relevant material and test evidence for the configuration, while the buyer should define where the cart operates and how it is included in the ESD control program. Avoid treating a resistance value or an “ESD” label as proof of universal performance.

4. Send a supplier-ready request
A useful request asks for one configuration and its supporting evidence. Include the load unit, largest size, required positions, loading side, route, floor, brake requirement, wheel preference, grounding method, target quantity, and any temperature or label requirement. Ask the supplier to return a drawing, model code, material or ESD classification, test basis, and revision date.
- Use the ESD Trolley category to identify a family, then confirm one named model.
- Compare the transfer-cart route with the ESD Rack route when the cart will dock at fixed storage.
- Use the ESD Magazine Rack route when the load is a magazine rather than a loose board or tray.
- Ask for model-specific dimensions, load, grounding, wheel, and test information before approving the order.
For acceptance, ask the supplier to identify which values apply to each available size or option. The model page may show more than one external size or adjustment range. Record the selected variant in the purchase document so a later replacement does not silently change the board support or route. A short sample trial should check loading, removal, braking, turning, and parking at the actual station.
References
- EOS/ESD Association: ESD Fundamentals, Part 3 — ESD control procedures and materials.
- EOS/ESD Association: ANSI/ESD S541-2026 — packaging properties and test-method context.
- IEC 61340-5-1:2024 — ESD control-program requirements.